Updated on August 16, 2023
Conversational experiences, where you talk to a system and the system talks back, can be difficult to build. If you have built a chatbot, or are considering building a chatbot, the name Dialogflow would have appeared right at the top of your Google Search bar. And with good reason. In this article, we talk primarily about Dialogflow Analytics and how to use Dialogflow training phrases to improve your chatbot. But before that:
What is Dialogflow?
Dialogflow is the NLU engine developed by Google, that allows you to understand language in your chatbot. Dialogflow CX is a powerful tool that helps you engineer advanced virtual agents, aka chatbots. CX stands for Customer Experience, and with Dialogflow CX, you can use a visual builder to build and train your chatbot, without the need to write complex code.
Of Course, if you are just starting out building your chatbot, there is always Dialogflow ES which stands for Essentials. Both Dialogflow ES and CX use intents, but in CX, the intents are simplified and reusable. Beginners use Dialogflow ES to build a simple chatbots. Dialogflow CX is the choice when you need to build complex agents for large enterprises.
How to use Dialogflow Analytics
In one of our previous articles, we had created a Dialogflow chatbot that helped us book movie tickets. We will use the same chatbot, albeit this time to learn more about Analytics.
To begin with, let’s select the Date Range between which you want to see how the chatbot is functioning. For the purposes of this tutorial, we have picked it for the month of February 2022:
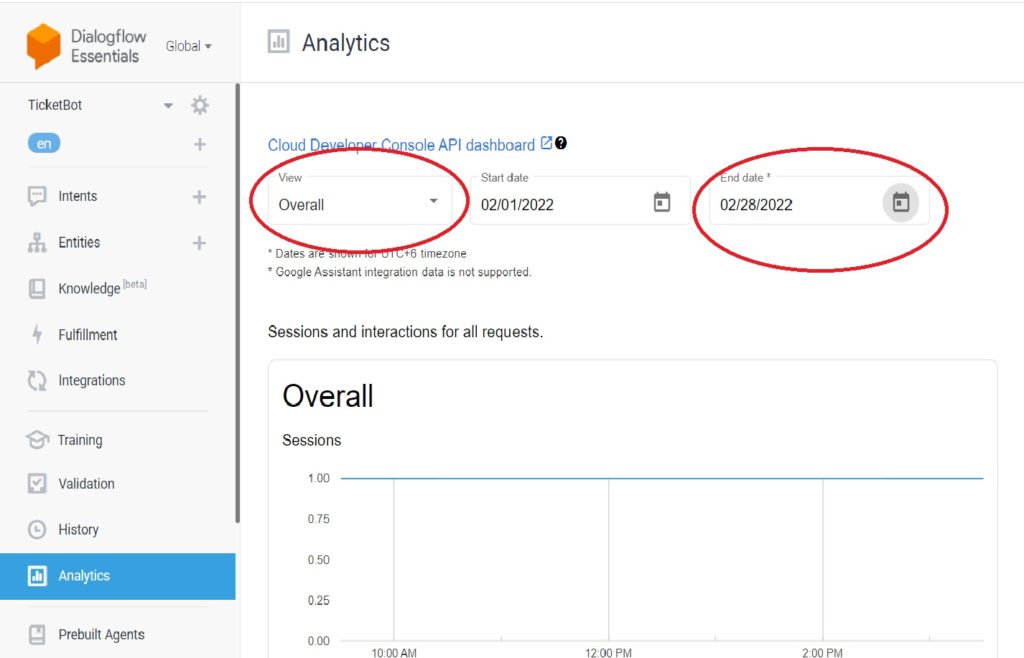
The first view that Analytics provides is the Overall view, in which you can see the number of Sessions and number of Interactions within the stipulated time period. In the given example, we had 1 interaction on 25th of February, and hence the flat line.
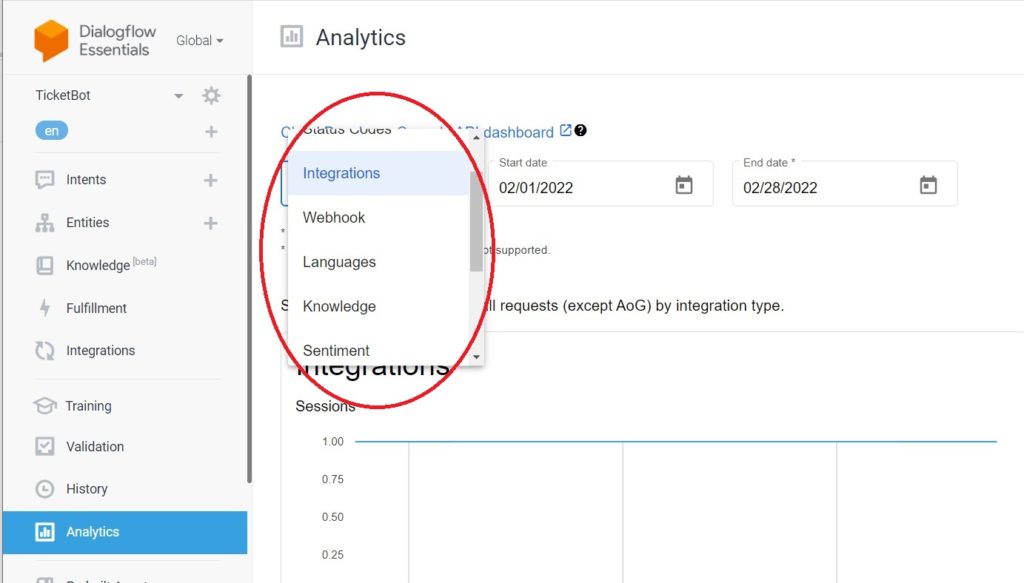
There are other views too which Dialogflow provides that help you understand the behavior of your chatbot.
These include:
- Status Code
- Integrations
- Webhooks
- Languages
- Knowledge
- Sentiment
- Speech
- Intents
- Intent Path
- Session Path
Important Analytics Parameters
Let us now look at some of the more interesting features in detail:
- Intents: Navigating to the Intents feature will give you the summarized stats by intent. This is a great place to see how your bot’s various use cases, since it tells you about the number of Sessions, the number of Interactions, and the Exit percentage.
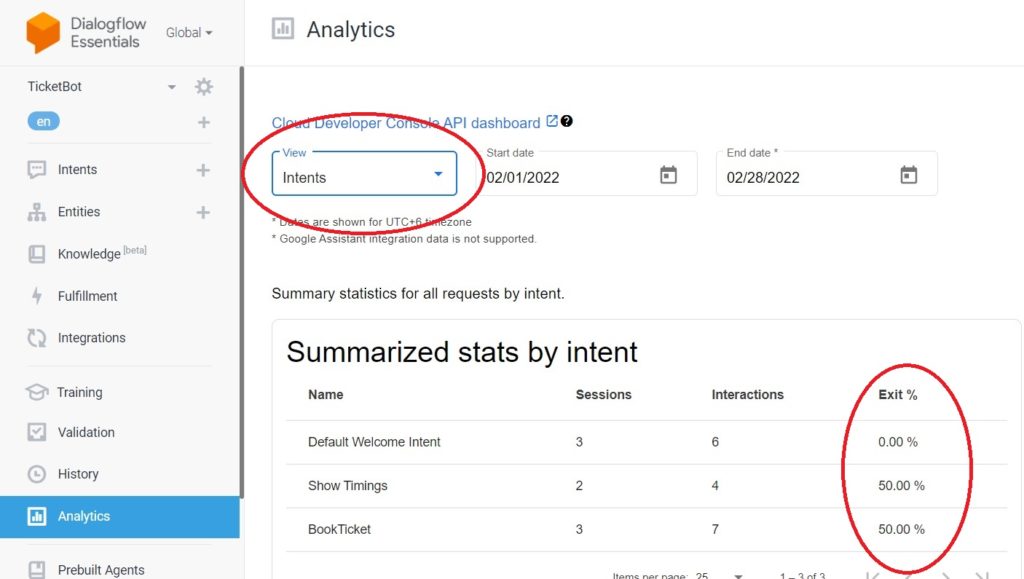
The Sessions feature tells you how many sessions the users had with that particular intent.
A thing to note here is the Exit percentage. If you see the example above, the Exit percentage is 50% for the intent Show Timings, which means that this is the intent where 50% of the users dropped off.
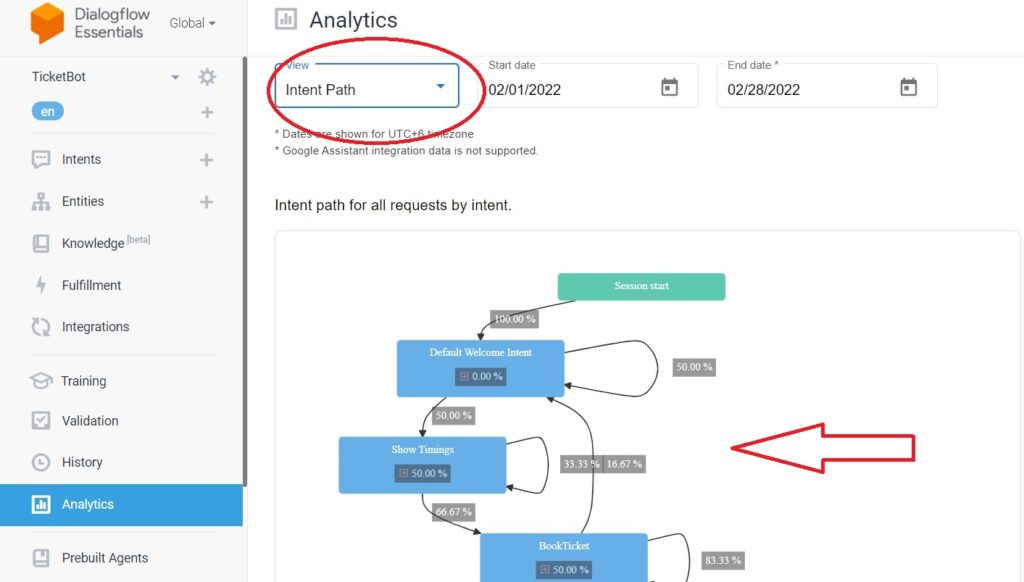
2. Intent Path View: The Intent Path view lets you know how people are interacting and engaging with your chatbot. The Intent Path should ideally be clear, and, if you observe that there are some strange connections in your intent path, then it’s time for you to see if you have assigned your Intents correctly. The Intent path shows the skeletal structure of your chatbot and is an important metric when it comes to Bot Analytics.
3.Session Path: Session Paths tell you how people are starting their sessions with your chatbot.
For instance, in the current Ticket Booking bot that we created earlier, the Session Path looks something like this:
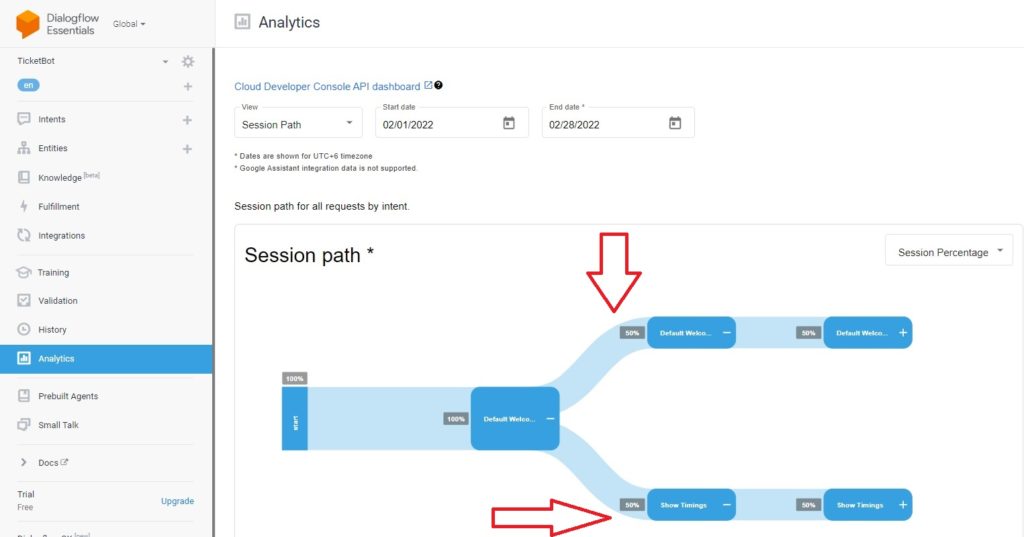
As you can see, a few people went from the Default Welcome Intent to the Show Timings Intent, whereas others continued on in the Default Welcome Intent and then moved on to ending the conversation.
As another example, here is the Session Path for a Dialogflow Chatbot developed by Google themselves.

If you hover the mouse over a particular Intent, it shows the metrics for that particular intent. The curved arrows indicate that the user session ended at that particular internet.
As you can see, the Session Data can give you a lot of information on how your chatbot is used. But what will you do with all that information? It is also important to train your chatbot so that it can give better answers to customers, and this is where Training comes into the picture.
How to use Dialogflow Training
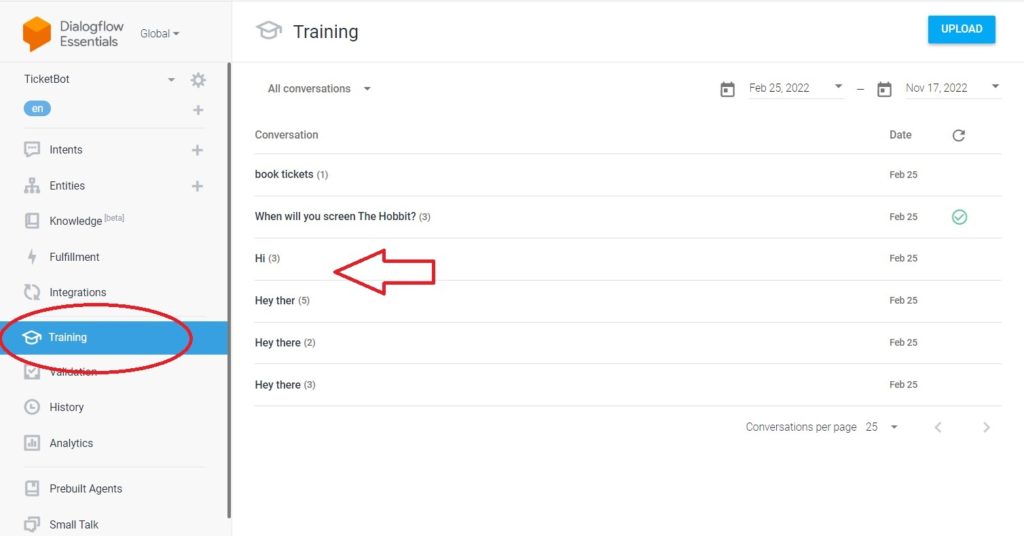
Once you navigate to the Training section, you will see all the conversations that happened between a user and your chatbot, and also the conversations that your chatbot did not understand.
To make your chatbot better, you need to train it to respond to situations where it did not understand what the user was trying to accomplish. To do this, go to the “All conversations” dropdown and select the “No match conversations.”
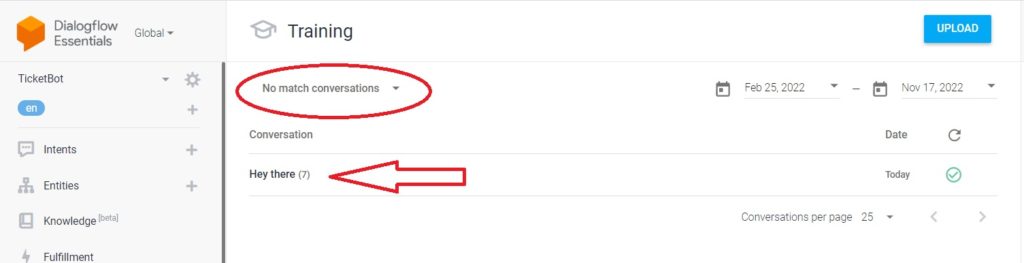
As you can see, there are 7 instances where the bot did not understand a query that a user had.
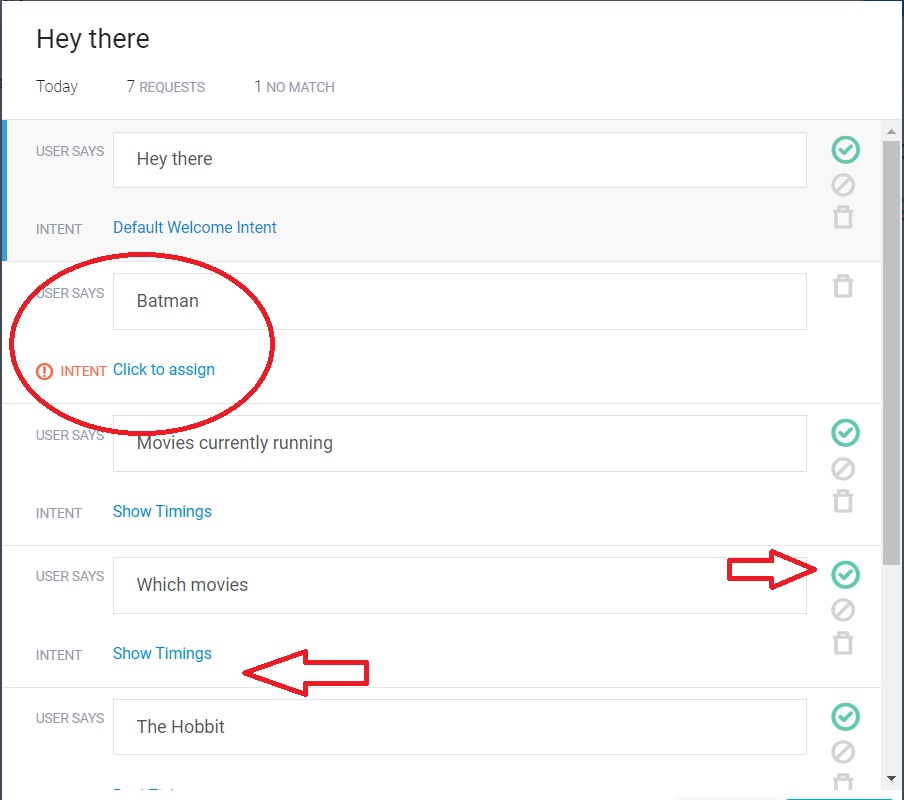
In the case of the phrase “Batman”, we already have an Intent which gives the list of movie names that are being screened currently.
So we can match this intent with Show Timings. Click on “Click To Assign” and Select “Show Timings” Intent, so that the next time a user types in Batman to your bot, the bot can respond with Show Timings.
You can choose from 3 options when assigning Intents to queries that your bot did not understand. The first one is “Add Intent to X,” where X is the Intent that you want to match to the phrase. The second one is “Add this Phrase to Default Fallback Intent,” where you direct users to the Default Fallback Intent. And the final one is “Remove Phrase,” where you remove the phrase that your bot didn’t understand completely.
Since we are training the bot so that it understands all sorts of queries, we are not going to use the “Remove Phrase,” option.
Adding a New Intent from the “No match conversations” tab:
Many times, there are phrases that the user will not understand and for which you would not have created Intents. In cases like these, Dialogflow allows you to create Intents on the Go, to which you can add training phrases later.
For example, in the instance given below, there is no intent that matches “ticket price.”
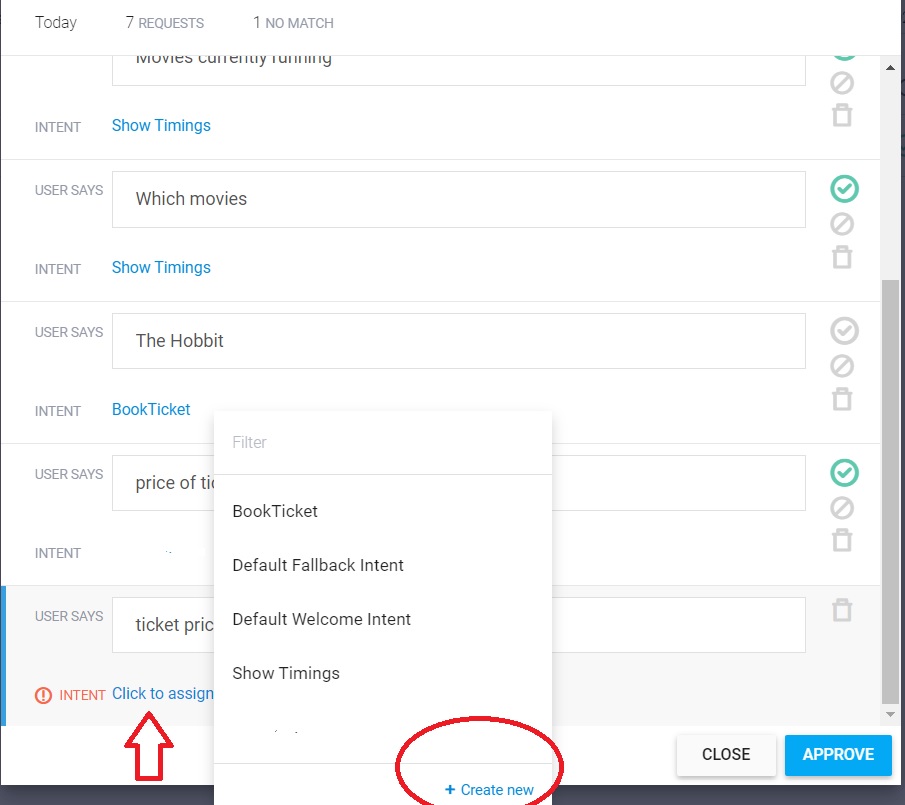
We then create an Intent Called “Ticket Price” and Hit Enter.
Now navigate to the Intents section and you will see the “Ticket Price” Intent generated there.
Populate this Intent with the Ticket prices that you want to display when the user asks for “ticket price,” on the bot.
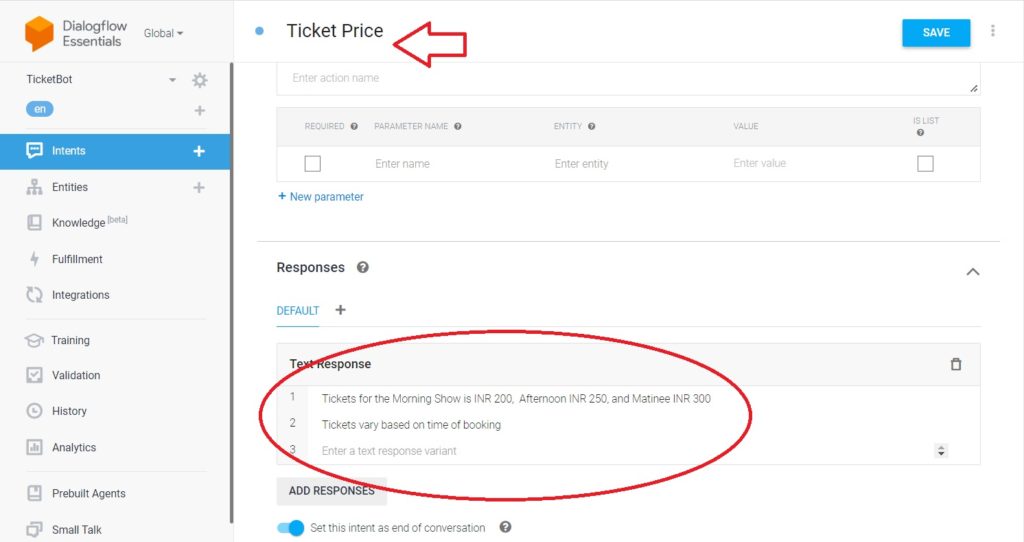
In this case, we have input, “Tickets for the Morning Show is INR 200, AfterNoon INR 250 and Matinee INR 300,” which would include all the options for ticket pricing in this particular movie theater.
Parting words
There you go! Some of the most common tactics on how to use Dialogflow Analytics and Training to improve your chatbot have been listed here.
To create the perfect Dialogflow Bot, you need to keep looking for phrases which your bot fails to understand. Once this is done, train the bot. Dialogflow Analytics is excellent to understand how your bot behaves. With the platform being adopted by more and more users, we are sure the above mentioned steps will come in handy someday. Keep watching this space for more content on Dialogflow.
At Kommunicate, we are envisioning a world-beating customer support solution to empower the new era of customer support. We would love to have you on board to have a first-hand experience of Kommunicate. You can signup here and start delighting your customers right away.