Updated on October 31, 2023
In this blog, we will help you in creating the chatbot using your Zendesk articles. This can help you to create the most efficient chatbot and save a lot of your time.
Prerequisites:
- Kompose chabot builder account, we will be importing articles to Kompose and create a chatbot. If you don’t have an account, please signup here for 30 days free trial.
- You need the Zendesk articles in JSON format so you can convert the file to .CSV and use it for building the Kompose chatbot.
- Zendesk provides API to export the articles, please check out the Zendesk documentation for more details.
How to import the Zendesk articles?
- You can visit the Zendesk documentation section to get the API details.
- Use POSTMAN tool to call the API and get the data, check out the following example to export the data. download the POSTMAN chrome extension or full application.
API provided by Zendesk is,
/api/v2/help_center/en-us/articles.json
Here you are going to append your Zendesk URL to call the API, URL is https://Kommunicate5578.zendesk.com and the API is /api/v2/help_center/en-us/articles.json
Now, append both and use it to call the API, please refer to the following URL.

https://Kommunicate5578.zendesk.com/api/v2/help_center/en-us/articles.json
3. Open the PostMan tool and mention your API in the GET method as shown below.
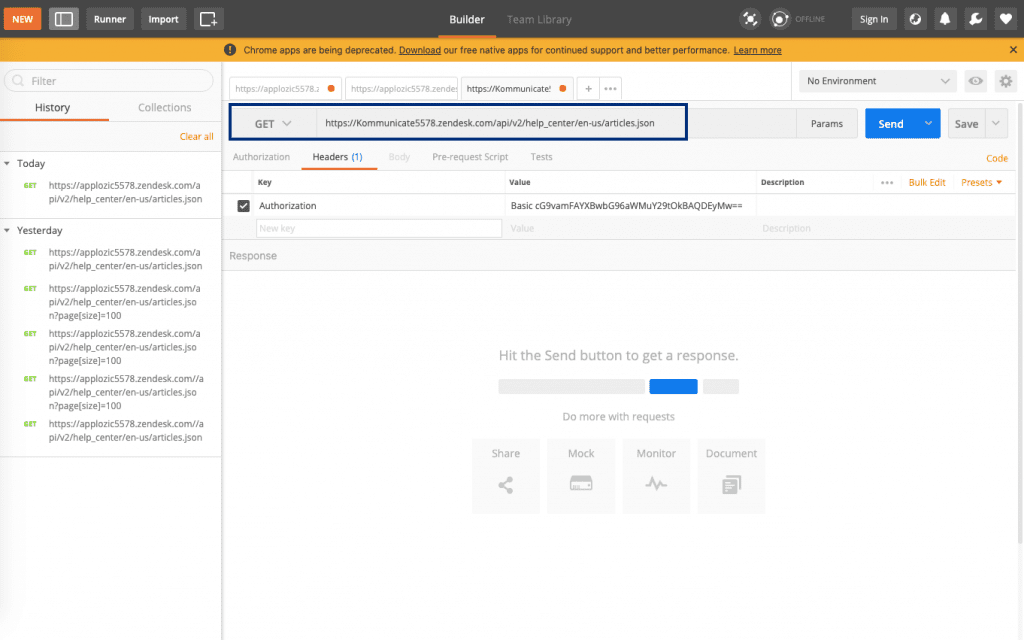
4. The next step is to add the Headers to call the API. To call the Zendesk API, Zendesk needs to authenticate your API call, add the Authentication value in the Headers.
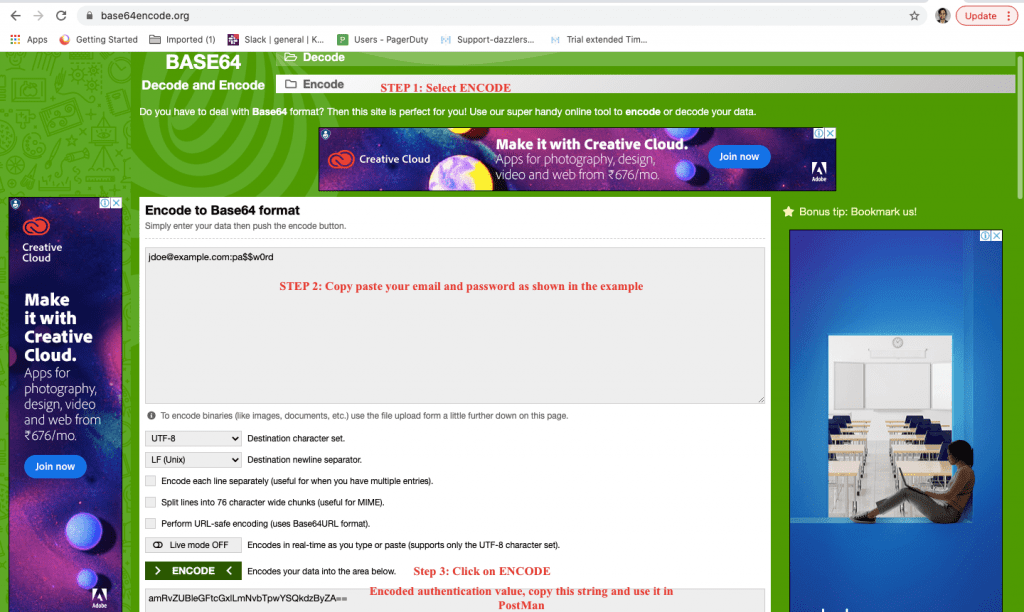
Authentication value will be combined values of your Zendesk login email address and password with a colon. Example: jdoe@example.com:pa$$w0rd. Mention your email and password in the same way as shown here.
5. Once you are ready with your email and password use https://www.base64decode.org/ to encode the above string, check out the screenshot below:
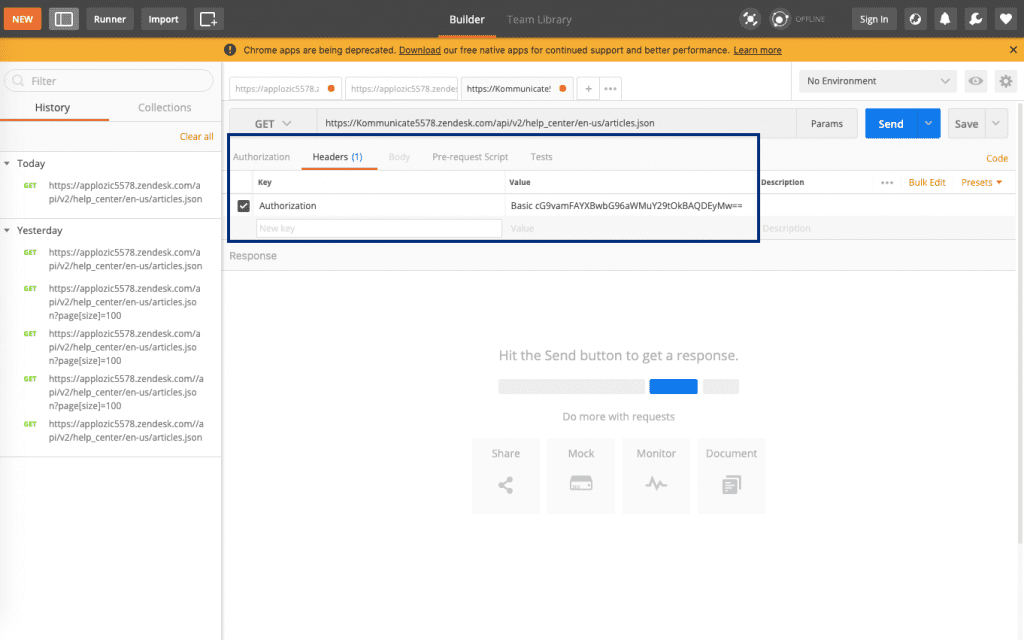
6. Copy the encoded string and paste in the value column of the Headers section
Now, call the API by clicking on Send option.
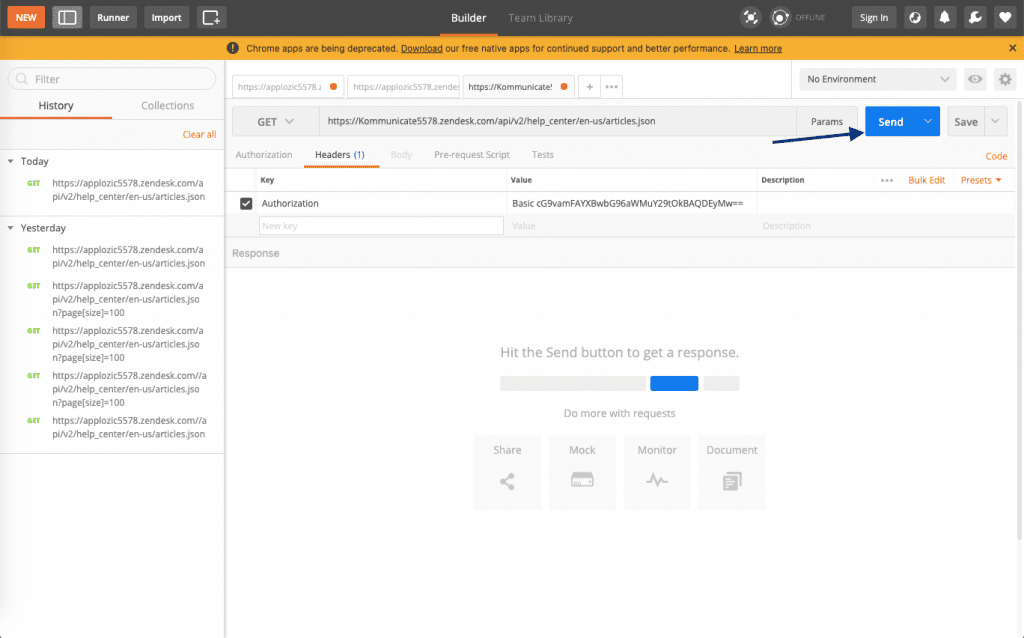
8. You will get the results in the bottom section, export that data
9. Convert the JSON file(exported data) into .CSV file using any online tool
How to create a chatbot
10. Now you have a file ready to create the Kompose chatbot, here you need to check the correct format that is supported by KOMPOSE, you can understand more about the format details here.
11. Kompose supports 2 columns, training phrase and bot response, remove all the other columns from the .CSV file and keep only 2 columns i.e article title and article body
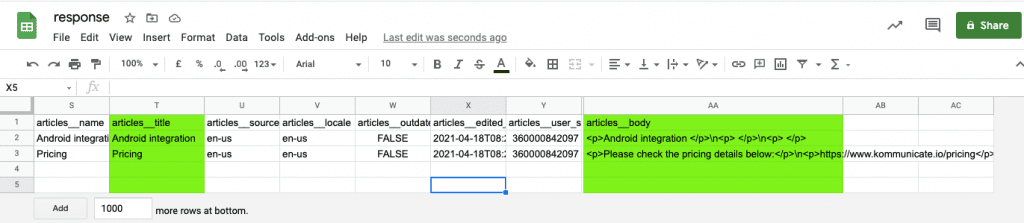
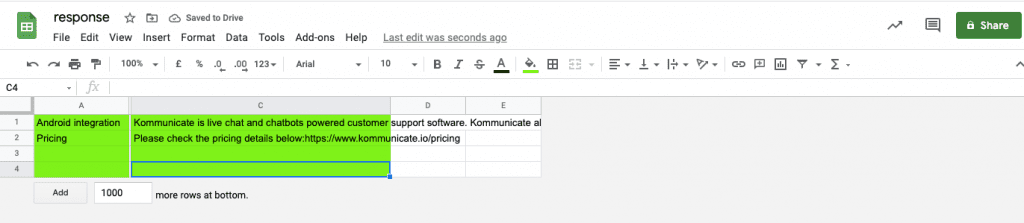
12. After removing you should have 2 columns as shown below, remove all the HTML tags and column names, keep the texts and hyperlinks.
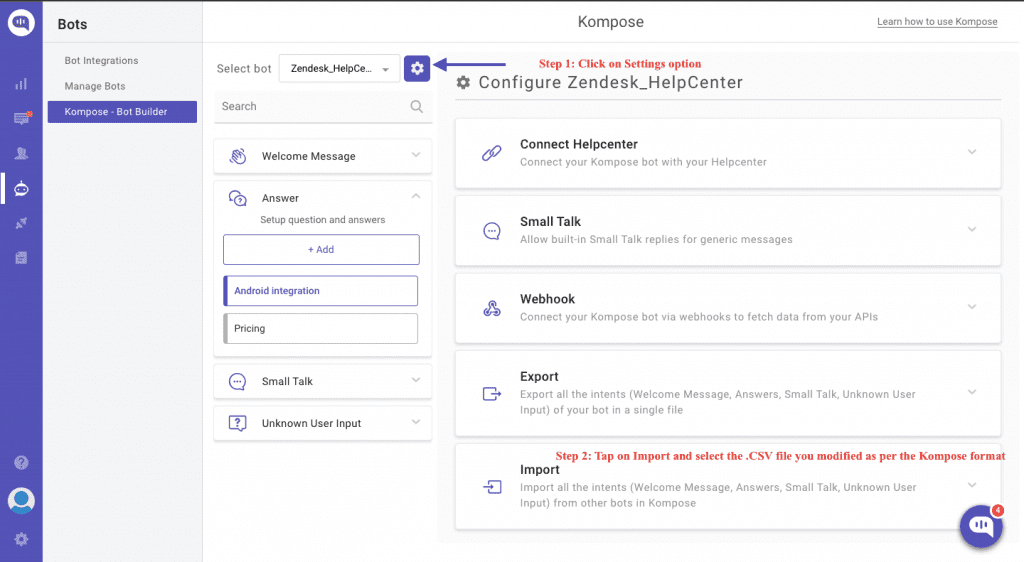
13. Next step is to import this .CSV file into Kompose chatbot. Visit the Bot Integration section on Kommunicate dashboard and create your Kompose chatbot
Once the chatbot is ready, >>click on the Settings options on Kompose builder section>> Import the file.
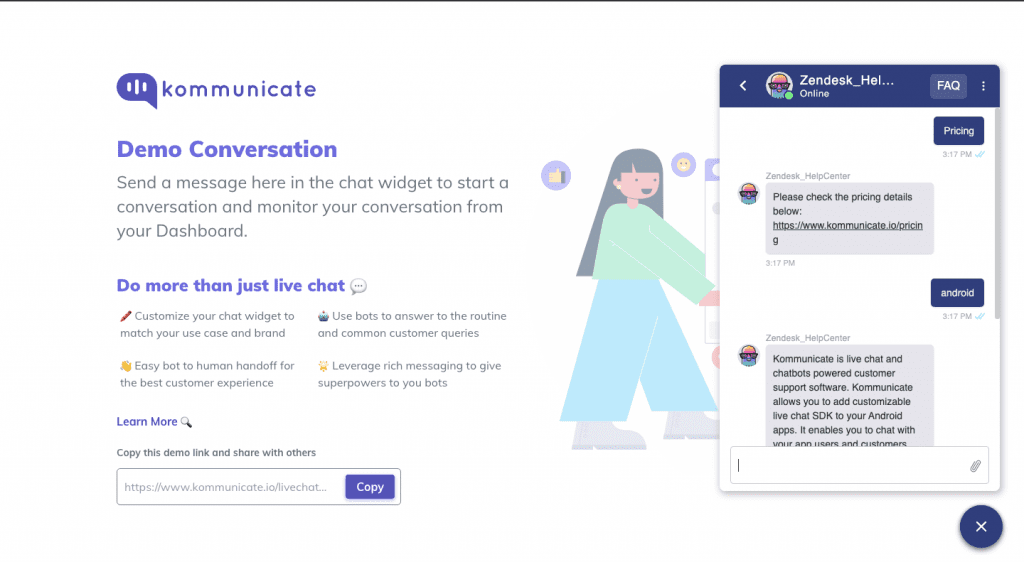
14. Now your chatbot is ready to test.
At Kommunicate, we are envisioning a world-beating customer support solution to empower the new era of customer support. We would love to have you on board to have a first-hand experience of Kommunicate. You can signup here and start delighting your customers right away.